 |
Open Test Framework
|
|
 |
Open Test Framework
|
|
Solution Settings are valid for the scope of a solution. In other words they are valid for all projects inside a solution. Solution Settings will be stored with the solution. To adjust the Solution Settings right click at the solution node (root node) in the Solution Explorer and select the Properties menu entry.
Inside the Solution Settings the following settings can be managed:
Related Topics:
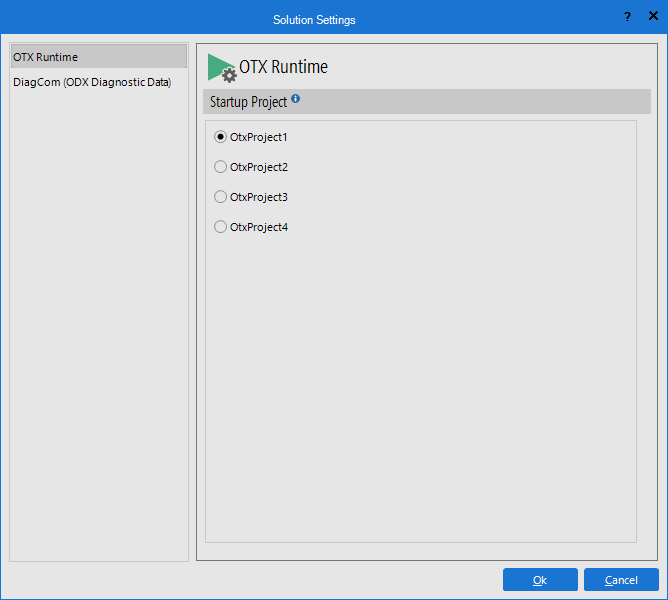
Inside this dialog one project can be set as the startup project of the current solution. The Startup Project will be executed if the user start the solution.

The change the startup project select the radio button of the related project.
Note: The startup project can be also selected by right clicking at the related project inside the Solution Explorer.
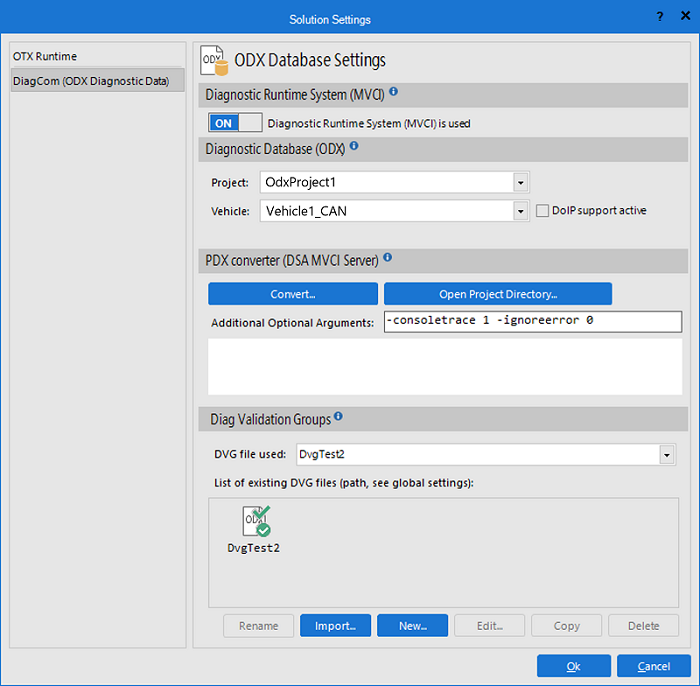
The OTF uses the OTX-DiagManager API for diagnostic communication. The general settings for the DiagManager are made in the Runtime Environment Settings. However, there are also settings that only apply to one solution. These settings are described below.

In principle, OTX sequences can also be created without vehicle diagnostics. The use of the diagnostic runtime system can be switched on and off via the switch button.
Note: If the use of the diagnosis runtime system is switched off, all diagnosis-relevant extensions are hidden in the OTF.
To use the diagnostic runtime system, ODX diagnostic data is required, which can be set here:
ComboBox. One database must be selected.ComboBox. One vehicle must be selected.CheckBox you can select whether communication should take place via DoIP. If the vehicle name contains the string "doip", the CheckBox is automatically selected.Note: The ODX tree is only available in the toolbox once an existing database and vehicle have been selected.
In case the DSA MVCI Server is used, all the PDX files (ODX data) can not be used directly and they have to be converted via the button "Convert...". The result of the PDX file conversion shall be displayed in the Output panel. The "Additional Optional Arguments" text box allows you to add the arguments used in PDX conversion, its default value is "-consoletrace 1 -ignoreerror 0" which means "write console trace = yes, ignore error = no ". After the conversion, you can select the newly converted ODX Database in the "Diagnostic Database (ODX) section" to use.
A Diag Validation Groups (DVG) enable the validation of links to ODX if the access path is unknown at design time. The DVG will be stored inside a file with extension .dvg inside the DVG folder. The DVG folder can be adjusted inside global OTF settings. Here a DVG file, which is valid for the current solution can be selected.
ComboBox. The selected DVG file is valid for the solution.ListBox. The selected DVG file is valid for the solution.ListBox can be renamed.ListBox can be edited, see Editing. Double-clicking the file does the same.ListBox is copied.ListBox is deleted.